It's a Self Portrait Challenge
In the past I've done a "pet week" and I've done a "self portrait week". Given discussions in some of my groups, I thought it would be fun do to another self portrait week. I will be traveling August 9 through 17 and starting now through Sunday, August 18, you can submit your self portrait to be published on this blog by posting it on my facebook page DK Miller. Please include the following:
1. Your photo - can be watermarked, no bigger than 800 px on the long end.
2. Your name as you want it to be published
3. Any link you would like to go with it - can be your website or if you don't have a website, maybe a cause you like.
This is not a curated or juried publication. All portraits that follow the rules will be included in the blog at some point between August 19 and August 30.
Rules:
1. Submit your image as described above
2. It must be a self portriat
3. It can not be a "long arm" shot where you are holding the camera when you take the picture.
If you have not done any self portrait work before or if you are not a photographer but want to give this a shot, I created a quick video to talk a little about how to. My son was kind enough to video this unrehearsed, one shot video (sorry but time ran out on me to spend more time on it). Here is the video and below it I type out instructions and tips as well.

Self portrait how to video
How to do a self portrait instructions:
Supplies/equipment required:
1. Camera that has a timer setting (this can be a dslr, a point and shoot or even a phone if you have an app that allows a timer. Camera+ on the iPhone allows for timer settings of 5, 15 and 30 seconds.)
2. Remote shutter release (optional but easier than a timer. You can take several shots before looking at the camera to increase the odds of having one you like.
3. Tripod or stable surface to put your camera on for the shot.
4. An object to focus on (can be an extra tripod, a light stand, a chair, a tree, or anything else that you can use to focus on and then stand in it's place OR stand next to if it's a tree or some other object in the environment that you can't move.
5. Yourself. :-)
Steps to take the portrait.
1. Get the camera set up on the tripod or stable surface. Take a few shots and make sure you have your exposure correct. I prefer manual settings but you can also use automatic exposure settings if you prefer.
2. Set your focus using the object. The focus object should ideally be placed where you will stand or sit or lay. Or in the same plane of focus (so a tree you will stand next to could work. Set your focus. Once you have it, if you can turn it to manual as well. Otherwise the camera will refocus every time you touch the shutter release.
3. If you can't do manual focus you will want to set your timer and press the shutter release while focusing on your object. Then run into place and move the object.
4. Otherwise go to your spot, move the focus object and use a remote shutter release to take some pictures.
5. Mark your spot or replace your focus object and go see if you are happy with the result. If not, take more photos until you do.
I hope that is clear and gives you the confidence to give it a go. Being able to take a decent self portrait is useful for social media profile photos, art projects, just getting yourself in the picture for events, if you find that you are the type always taking the picture but never in it.
Below on the left is a test shot I took to make sure I really was happy with my exposure and focus and on the right is the final, edited image.
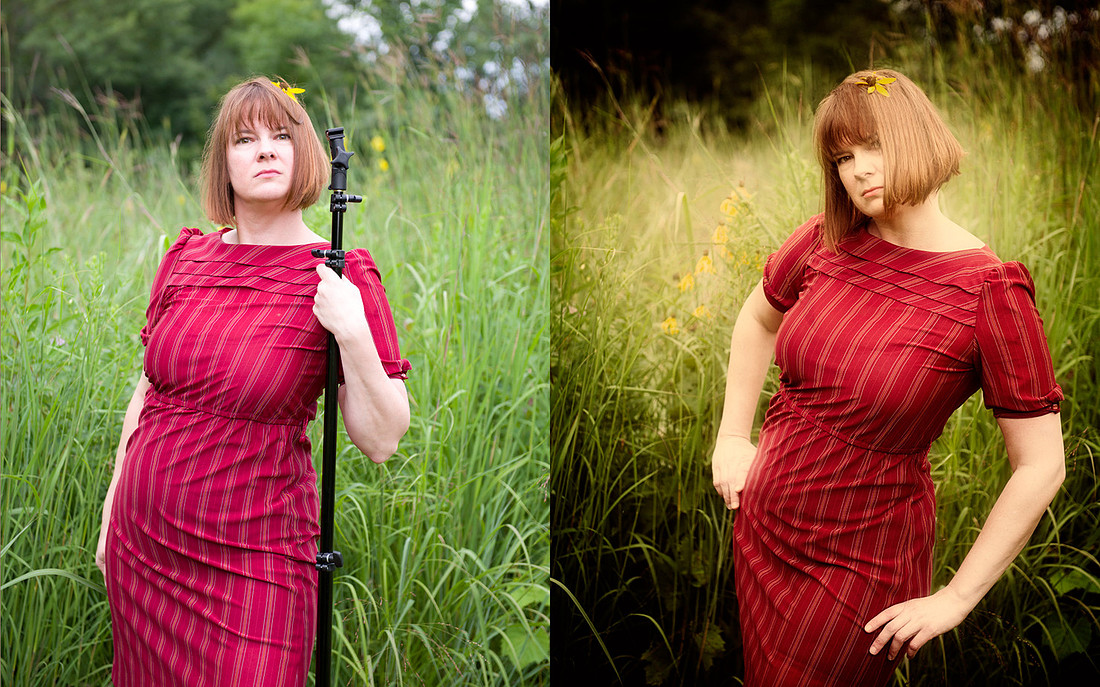
Have a great week! I can't wait to see what you come up with.

